qt-C++笔记之QProcess
code review!
文章目录
- qt-C++笔记之QProcess
- 一.示例:QProcess来执行系统命令ls -l命令并打印出结果
- 说明
- 二.示例:QProcess来执行系统命令ls -l命令并打印出结果,代码进一步丰富
- 三.示例:使用 QProcess 在 Qt 中执行 Bash 脚本并处理参数
- 四.ChatGPT讲解
- Including QProcess
- Creating a QProcess Object
- Starting a Process
- Reading Output
- Writing to the Process
- Checking if the Process is Running
- Waiting for the Process to Finish
- Terminating the Process
- Getting the Exit Status
- Example Usage

一.示例:QProcess来执行系统命令ls -l命令并打印出结果

代码
#include <QCoreApplication>
#include <QProcess>
#include <QDebug>int main(int argc, char *argv[]) {QCoreApplication a(argc, argv);// 创建QProcess实例QProcess process;QString program_middle = "ls";QStringList middle_arguments;middle_arguments << "-l";// 启动进程执行命令process.start(program_middle, middle_arguments);// 等待进程结束process.waitForFinished();// 读取并打印进程的标准输出QByteArray result = process.readAllStandardOutput();qDebug() << result;return 0;
}
or
代码
#include <QCoreApplication>
#include <QProcess>
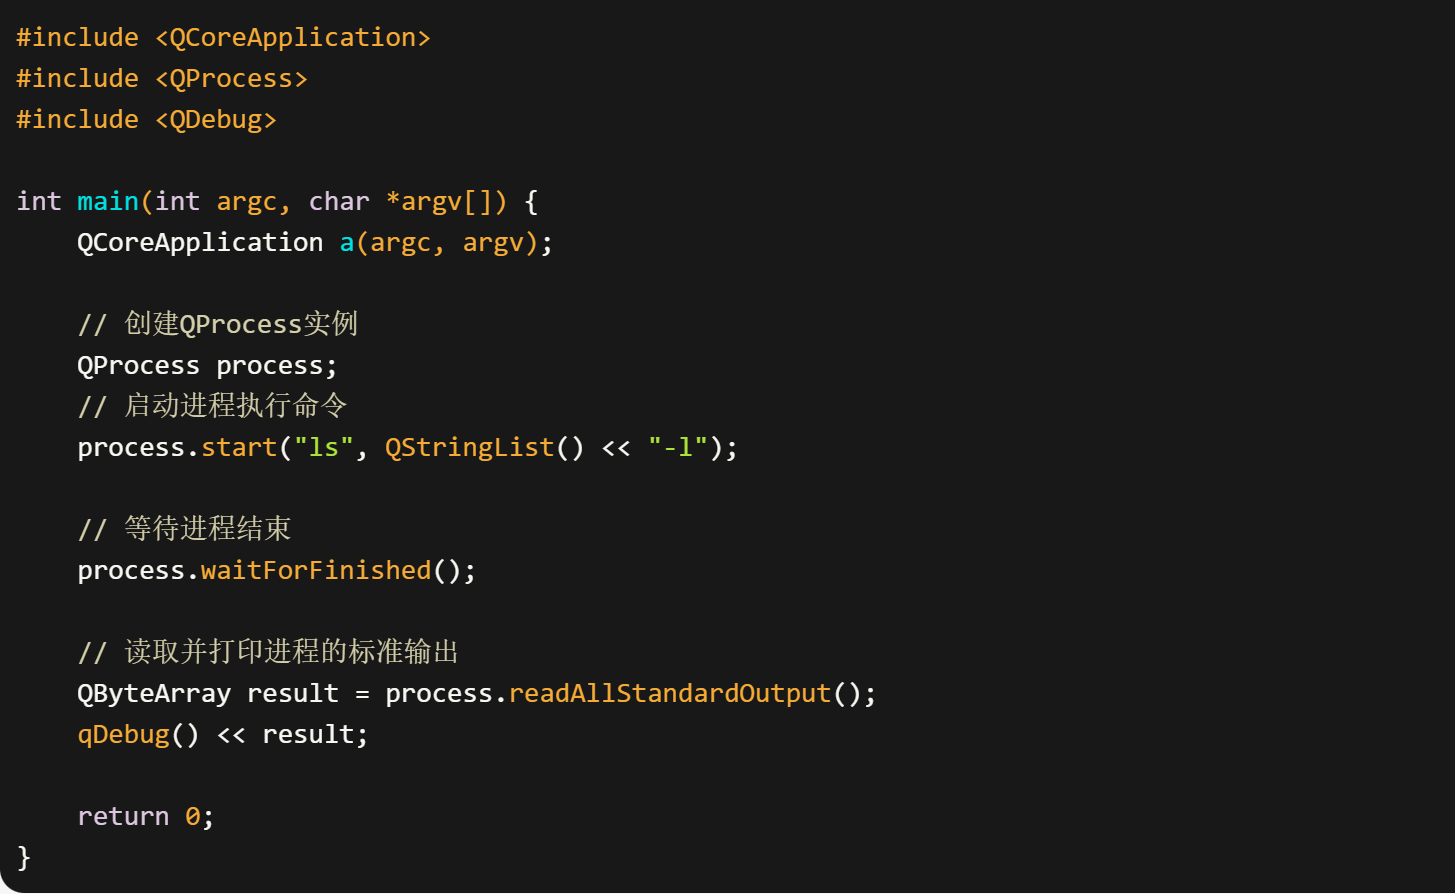
#include <QDebug>int main(int argc, char *argv[]) {QCoreApplication a(argc, argv);// 创建QProcess实例QProcess process;// 启动进程执行命令process.start("ls", QStringList() << "-l");// 等待进程结束process.waitForFinished();// 读取并打印进程的标准输出QByteArray result = process.readAllStandardOutput();qDebug() << result;return 0;
}
说明
这个简短的示例中:
- 创建了
QProcess对象。 - 使用
start方法执行了ls -l命令。 - 使用
waitForFinished方法等待命令执行完成(请注意,这会阻塞,直到外部命令执行完成)。 - 读取了命令的标准输出,并使用
qDebug打印到控制台。
此代码省略了错误处理和信号/槽连接,适用于简单的同步命令执行。如果你想要异步处理或更复杂的错误处理,你需要采用第一个例子中的更详细的方法。
二.示例:QProcess来执行系统命令ls -l命令并打印出结果,代码进一步丰富
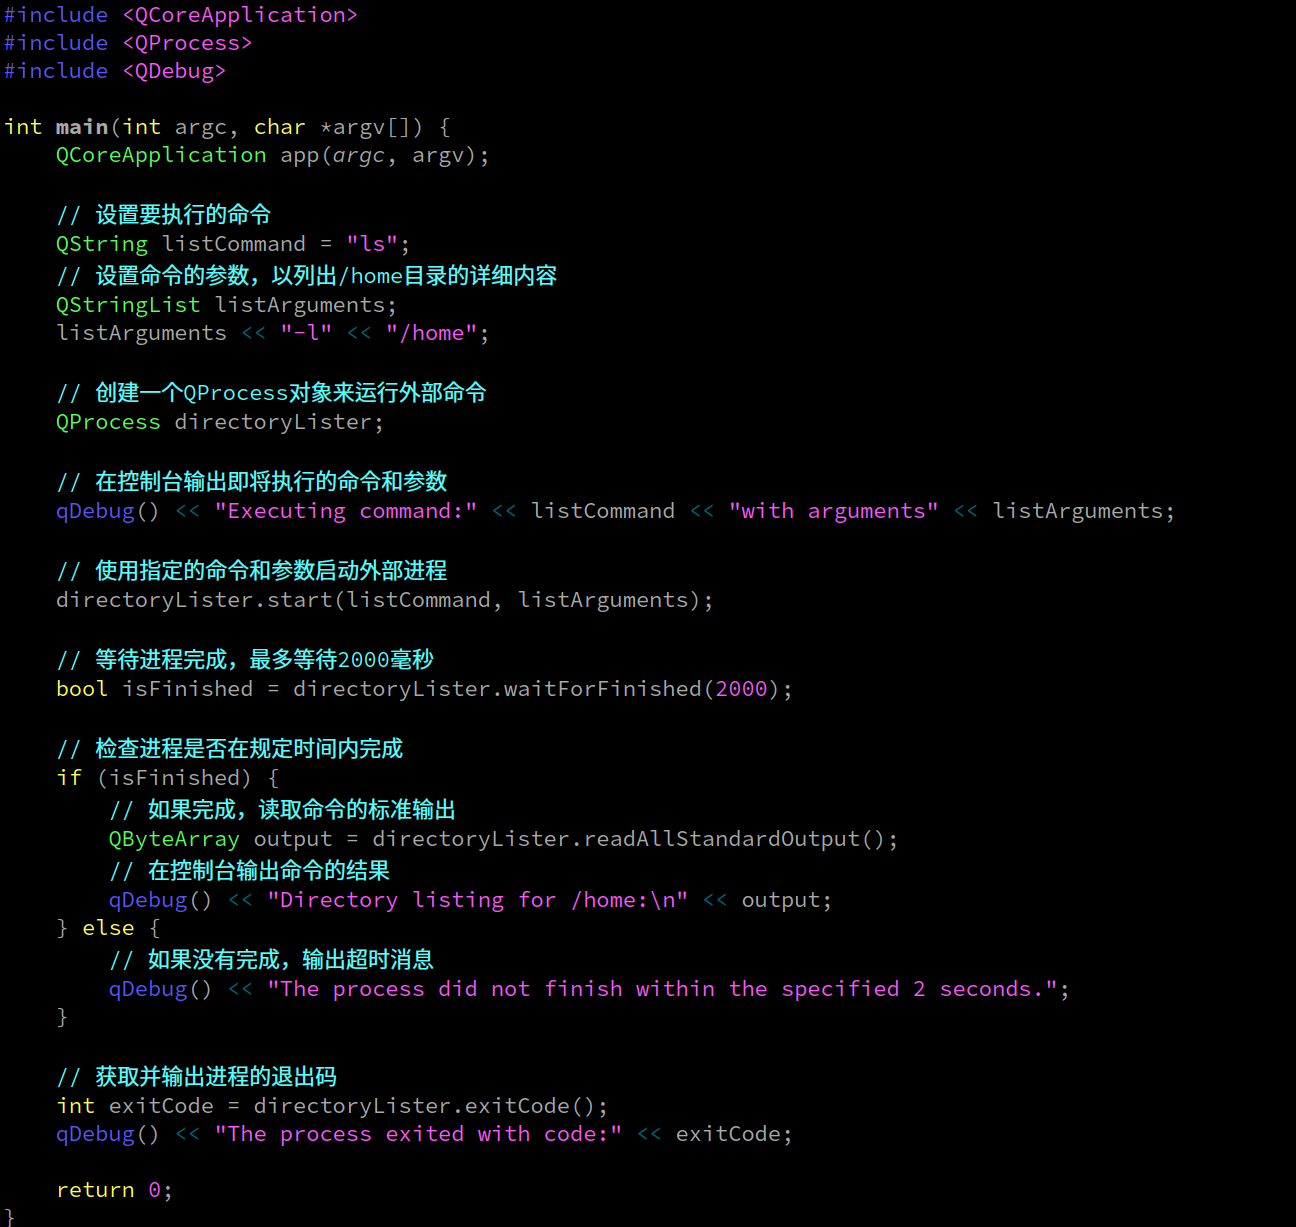
代码应该具有清晰的命名,详细的注释,以及适当的输出信息。下面是修改后的示例:
代码
#include <QCoreApplication>
#include <QProcess>
#include <QDebug>int main(int argc, char *argv[]) {QCoreApplication app(argc, argv);// 设置要执行的命令QString listCommand = "ls";// 设置命令的参数,以列出/home目录的详细内容QStringList listArguments;listArguments << "-l" << "/home";// 创建一个QProcess对象来运行外部命令QProcess directoryLister;// 在控制台输出即将执行的命令和参数qDebug() << "Executing command:" << listCommand << "with arguments" << listArguments;// 使用指定的命令和参数启动外部进程directoryLister.start(listCommand, listArguments);// 等待进程完成,最多等待2000毫秒bool isFinished = directoryLister.waitForFinished(2000);// 检查进程是否在规定时间内完成if (isFinished) {// 如果完成,读取命令的标准输出QByteArray output = directoryLister.readAllStandardOutput();// 在控制台输出命令的结果qDebug() << "Directory listing for /home:\n" << output;} else {// 如果没有完成,输出超时消息qDebug() << "The process did not finish within the specified 2 seconds.";}// 获取并输出进程的退出码int exitCode = directoryLister.exitCode();qDebug() << "The process exited with code:" << exitCode;return 0;
}
在这个修改后的代码中:
- 变量
app代替了a,表示这是一个应用程序的实例。 - 变量
listCommand和listArguments直观地表示了将被执行的命令及其参数。 - 对象
directoryLister表示一个能够列出目录内容的进程。 - 注释详细描述了代码的每一个部分,帮助理解每一行代码的作用。
- 输出信息采用了更加清晰和教育性的语言,适合教科书风格。
三.示例:使用 QProcess 在 Qt 中执行 Bash 脚本并处理参数
1.运行

2.文件结构

3.cmd.sh
#!/bin/bash
# 这个脚本接受一个目录作为参数,并列出其内容DIR=$1if [ -z "$DIR" ]; thenecho "Usage: $0 <directory>"exit 1
fils $DIR
4.main.cpp
代码
#include <QCoreApplication>
#include <QDebug>
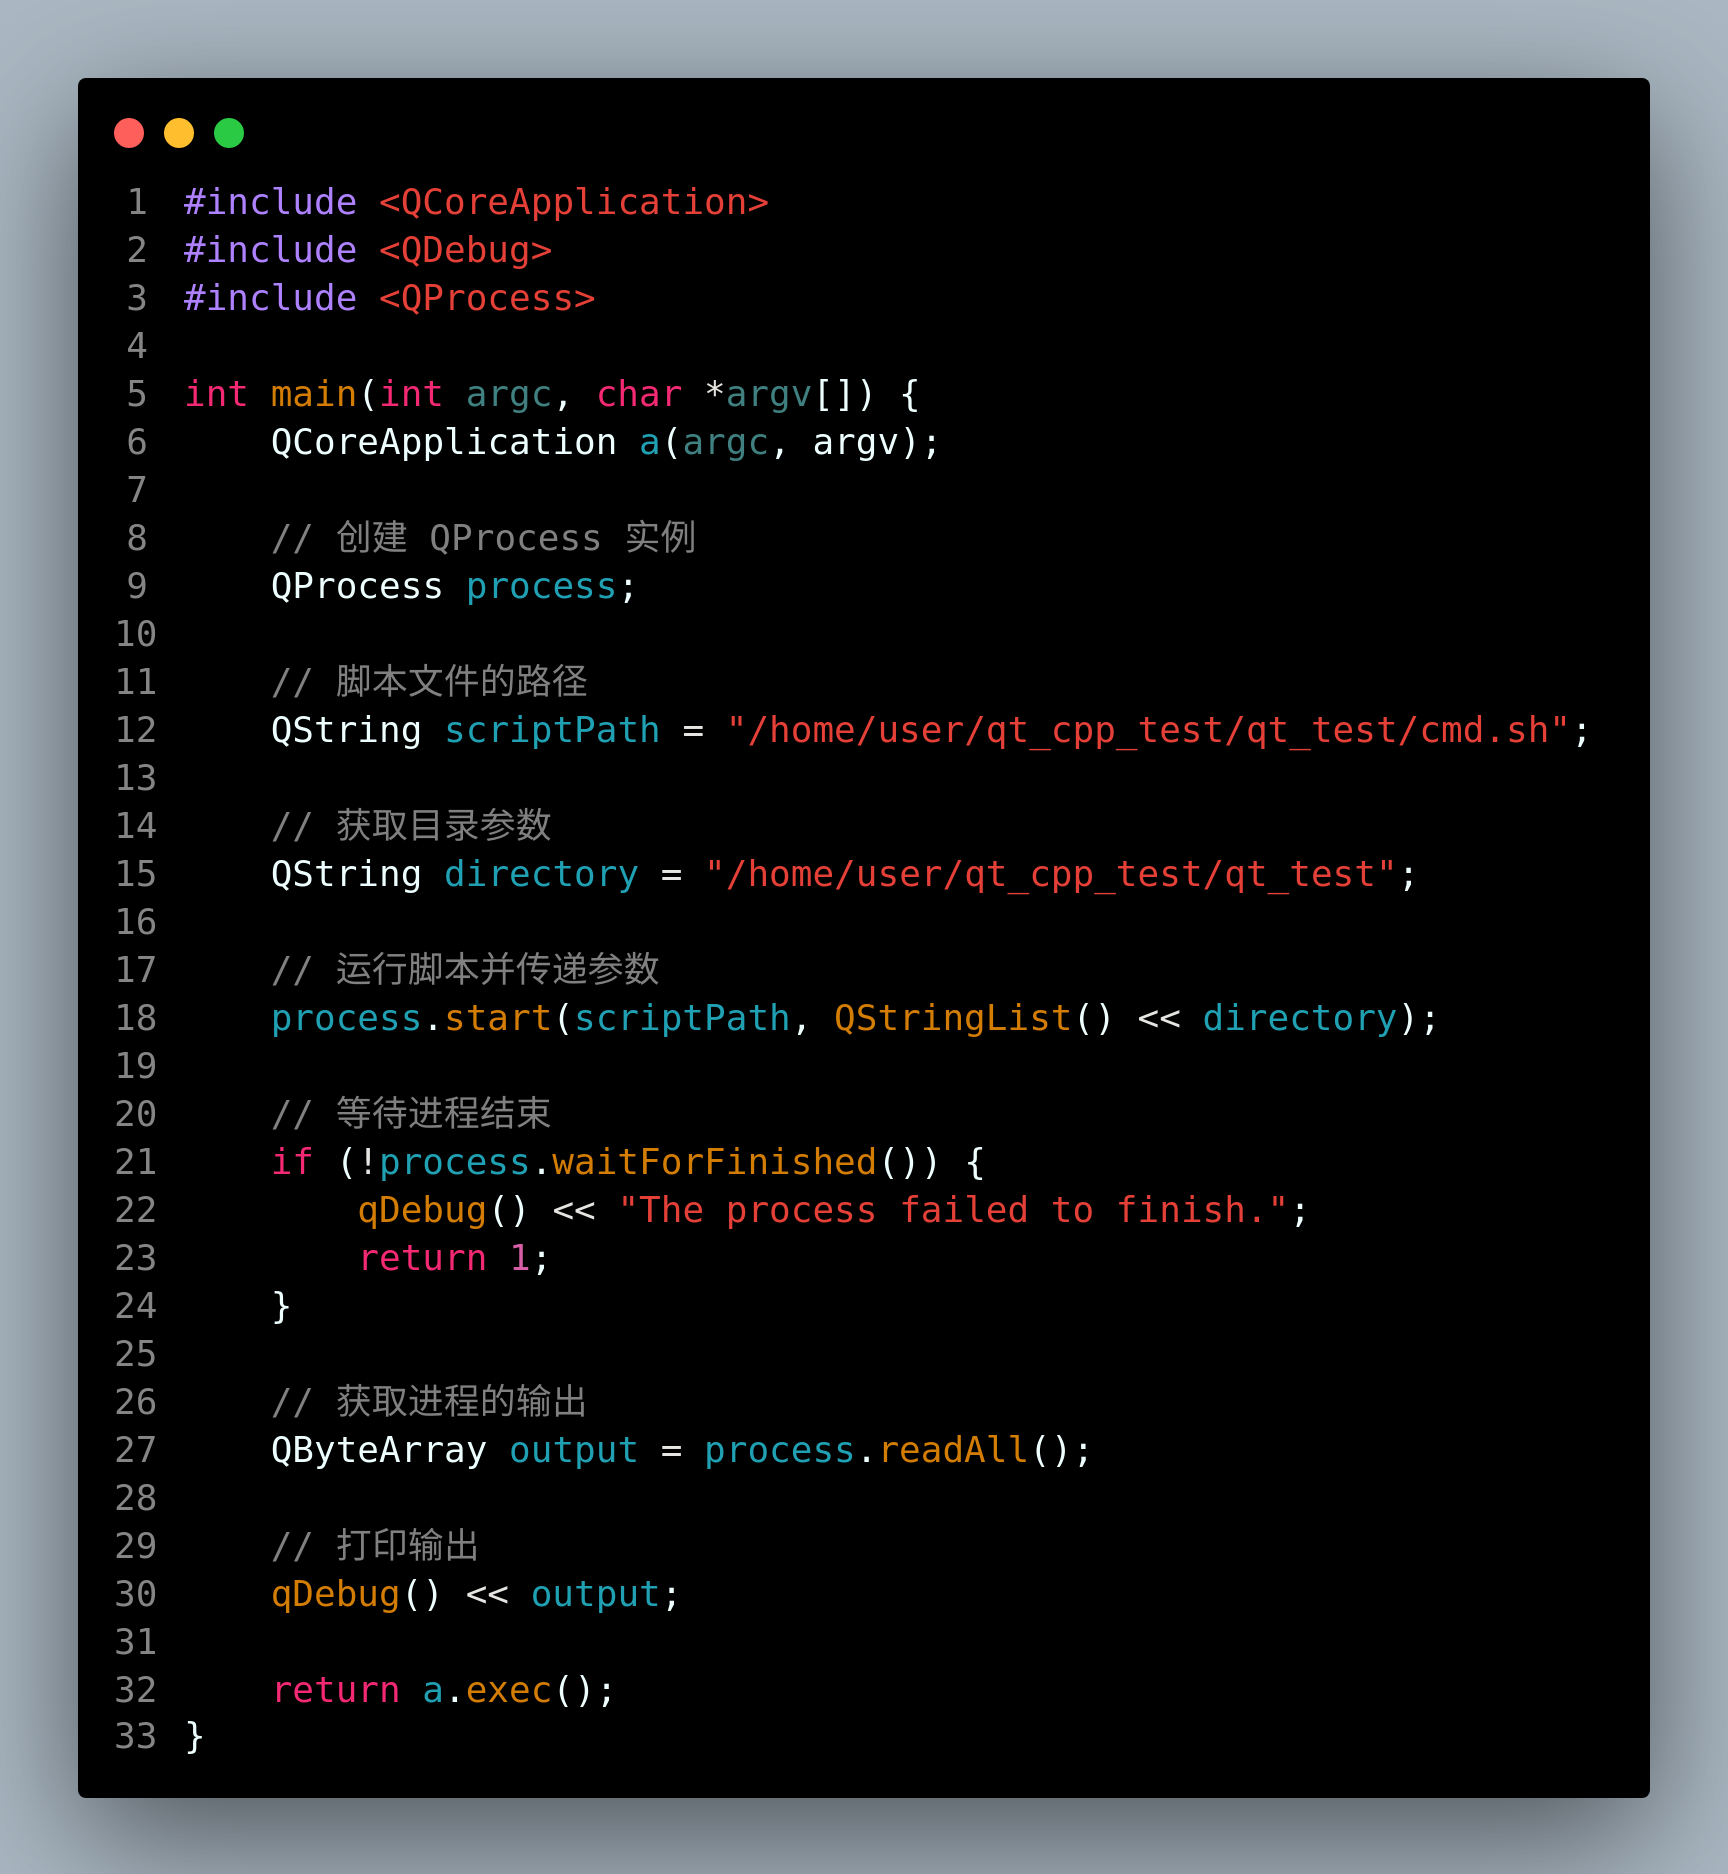
#include <QProcess>int main(int argc, char *argv[]) {QCoreApplication a(argc, argv);// 创建 QProcess 实例QProcess process;// 脚本文件的路径QString scriptPath = "/home/user/qt_cpp_test/qt_test/cmd.sh";// 获取目录参数QString directory = "/home/user/qt_cpp_test/qt_test";// 运行脚本并传递参数process.start(scriptPath, QStringList() << directory);// 等待进程结束if (!process.waitForFinished()) {qDebug() << "The process failed to finish.";return 1;}// 获取进程的输出QByteArray output = process.readAll();// 打印输出qDebug() << output;return a.exec();
}
5.qt_test.pro
QT += widgets core
TARGET = qt_test
TEMPLATE = app
SOURCES += main.cpp
四.ChatGPT讲解
QProcess is a class provided by the Qt framework to start external programs and communicate with them. It can be used to start, terminate, and communicate with external programs using standard input/output or through specific channels.
Here’s an overview of how you might use QProcess in a Qt application:
Including QProcess
Before using QProcess, you need to include the QProcess header:
#include <QProcess>
Creating a QProcess Object
You can create a QProcess object like any other object in Qt:
QProcess *process = new QProcess(parent);
The parent is a pointer to a parent QObject, which takes ownership of the QProcess object, ensuring that it will be deleted when the parent is.
Starting a Process
You can start a process by calling the start method, providing the command and arguments to run:
process->start("executable", QStringList() << "arg1" << "arg2");
Or if you just need to execute a command without arguments:
process->start("executable");
Reading Output
You can read the standard output and error of the process:
QObject::connect(process, &QProcess::readyReadStandardOutput, [=]() {QByteArray standardOutput = process->readAllStandardOutput();// Process standard output here
});QObject::connect(process, &QProcess::readyReadStandardError, [=]() {QByteArray standardError = process->readAllStandardError();// Process standard error here
});
Writing to the Process
You can write to the standard input of the process:
process->write("input data");
Checking if the Process is Running
You can check if the process is still running:
if (process->state() == QProcess::Running) {// Process is running
}
Waiting for the Process to Finish
You can wait synchronously for the process to finish:
process->waitForFinished(); // Waits until the process has finished
Terminating the Process
You can terminate the process:
process->terminate(); // Sends a terminate signal
Or kill the process:
process->kill(); // Kills the process immediately
Getting the Exit Status
Once the process has finished, you can get the exit status:
int exitCode = process->exitCode();
QProcess::ExitStatus exitStatus = process->exitStatus();
Example Usage
Here’s a simple example of using QProcess to run a command and print its output:
#include <QCoreApplication>
#include <QProcess>
#include <QDebug>int main(int argc, char *argv[]) {QCoreApplication a(argc, argv);QProcess process;process.start("ls", QStringList() << "-l" << "/");if (!process.waitForStarted()) // Default timeout is 30 secondsreturn 1;if (!process.waitForFinished()) // Default timeout is 30 secondsreturn 2;qDebug() << process.readAllStandardOutput().trimmed();return a.exec();
}
This example runs the ls -l / command, which lists the contents of the root directory in a detailed format, then prints the output. Remember that the waitForStarted() and waitForFinished() methods are blocking calls; in a GUI application, you would typically connect the finished() signal to a slot to handle the process completion asynchronously.



![[redis] redis的安装,配置与简单操作](https://img-blog.csdnimg.cn/direct/7c1cb14e52334df3b728494c88338278.png)

