FreeBASIC与TinyPTC绘图
TinyPTC是个操作非常简单的库,有各平台用的版本,linux平台版本又分为sdl版和gfx版,gfx版本比sdl版本速度快,尺寸不大,可操作的函数只有3个:
ptc_open, ptc_update, ptc_close
sdl版本增加了一个回调函数 ptc_cleanup_callback , 在TinyPTC即将结束前的回调。gfx版本增加了像素格式转换,用asm写的,nasm编译,ar\as处理,但没实际意义、只是放在了那里,编译mmx.s和yvs12.s与gcc的其它.o不能链接成 .a 库,修改Makefiles配置文件将AOBJECTS去掉即可。
FreeBASIC有它的.bi头文件,但没有它的.a库,所以需要自己编译(系统上要有gcc, make工具链)。对TinyPTC-SDL-0.3.2编译:到sourceforge下载后解压,在解压后的目录内执行:
make && sudo make install 即可,libtinyptc.a 是它生成的库文件,如果不 sudo make install 则将这个文件考贝到 /usr/lib/x86_64-linux-gnu下即可。
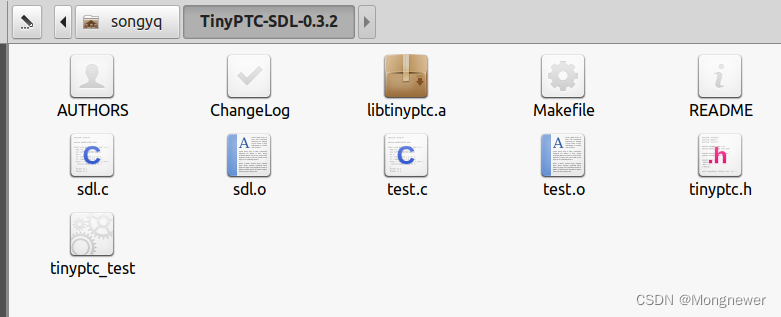
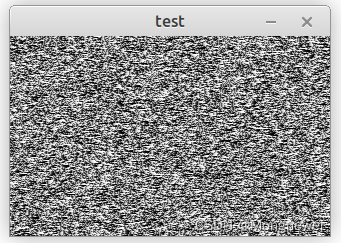
编译完成后生成一个测试程序 tinyptc_test,在终端上执行 ./tinyptc_test 显示不断变化的噪音信号,就好像老电视机收不信号满屏雪花一样。
X11 gfx版本编译事项

打开Makefile文件,将链接时的 $(AOBJECTS) 去掉。然后:
make && sudo make install ,或是直接考贝到 /usr/lib/x86_64-linux-gnu 下。

FreeBasic示例程序一:正弦曲线,中间画一条直线。
ptc_open前定义一个宽w高h的像素数组,freebasic 整数是32位的,正好是rgba的像素数 4 个8bit, ptc_open后以这个w和h的一半计算出x点对应的y点,再折算成连续数组中的位置,然后 ptc_update这个数组,就显示到屏幕上了。如果是bmp位置,可以获取位置长宽后读取位置数据装入到数组中,然后ptc_update到屏幕上去。

#include "tinyptc.bi" const SCR_WIDTH = 1024
const SCR_HEIGHT = 768const SCR_SIZE = SCR_WIDTH*SCR_HEIGHT dim shared buffer( 0 to SCR_SIZE-1 ) as integer if( ptc_open( "Simple lines", SCR_WIDTH, SCR_HEIGHT ) = 0 ) then Print "Can not create ptc window!"end -1 end if 'data buffer is integer, e.g. 32bit/4byte color in depth'data arranged in ARGB order at each buffer cell &HaarrggbbDim as integer x, yDim as double rad = 0Dim as double PI = 3.1415926Dorad = 0for x = 0 to SCR_WIDTH/2 - 1''Line diagonal'y = x*(SCR_HEIGHT-1)/(SCR_WIDTH-1)'buffer(y*SCR_WIDTH + x) = RGBA(255, 0, 255, 0)'Sine wavey = SCR_HEIGHT/4 + (SCR_HEIGHT/5)*cos(rad)rad += 0.05if rad > 2*PI thenrad = 0end ifbuffer(y*SCR_WIDTH + x) = RGBA(255, 255, 0, 0)'axesy = SCR_HEIGHT/4buffer(y*SCR_WIDTH + x) = RGBA(255, 0, 0, 0)			next xptc_update @buffer(0) sleep 10loop until( inkey = chr( 27 ) )ptc_close
FreeBasic示例程序二:雪花噪音信号发生器
运算逻辑同示例一,只是算法不同,程序中有计算方法可细了解。
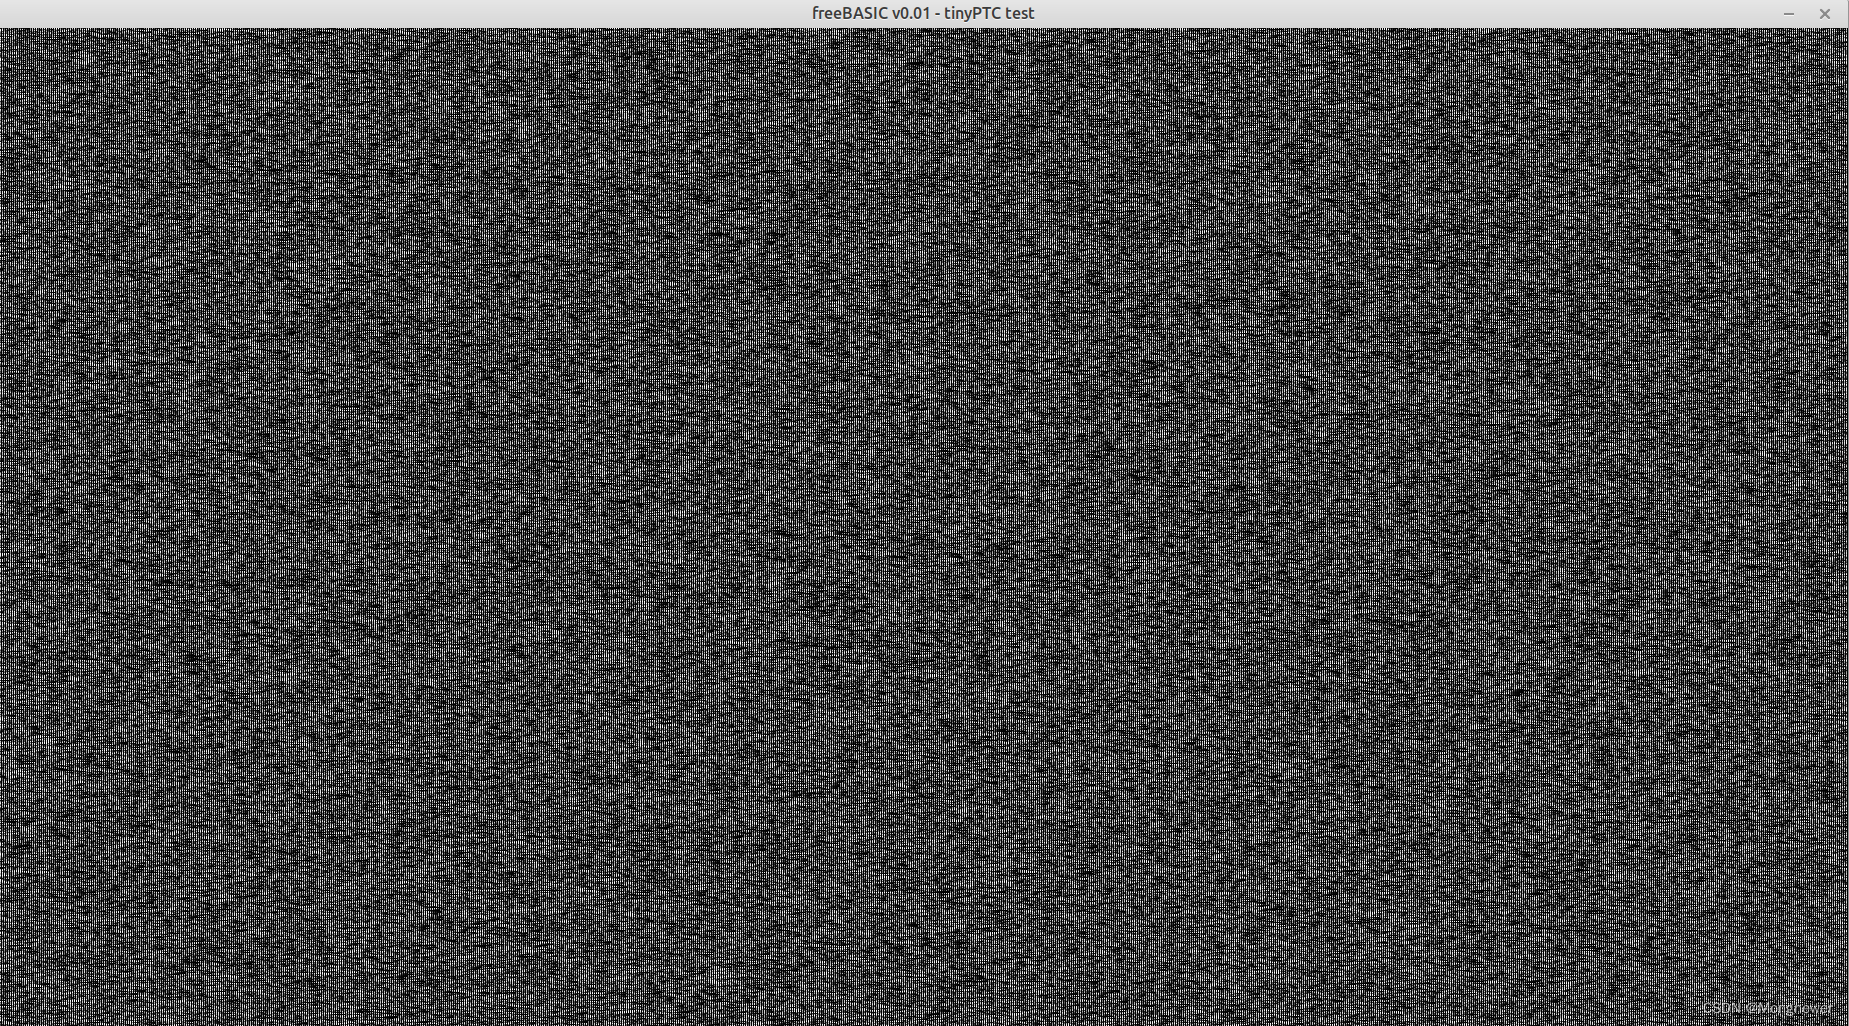
''
'' ordinary TinyPTC test, based on the original
''#include "tinyptc.bi"'const SCR_WIDTH = 320
'const SCR_HEIGHT = 200const SCR_WIDTH = 1850
const SCR_HEIGHT =1000const SCR_SIZE = SCR_WIDTH*SCR_HEIGHTdim shared buffer( 0 to SCR_SIZE-1 ) as integer'Integer is 8Bytes, e.g. 64bits per sizeof(integer)dim noise as integer, carry as integer, index as integer, seed as integerif( ptc_open( "freeBASIC v0.01 - tinyPTC test", SCR_WIDTH, SCR_HEIGHT ) = 0 ) thenend -1end ifseed = &h12345dofor index = 0 to SCR_SIZE-1noise = (seed shr 3) xor seedcarry = noise and 1noise = noise shr 1seed = seed shr 1seed = seed or (carry shl 30)noise = noise and &hFFbuffer(index) = rgb( noise, noise, noise )next indexptc_update @buffer(0)loop until( inkey = chr( 27 ) )ptc_close
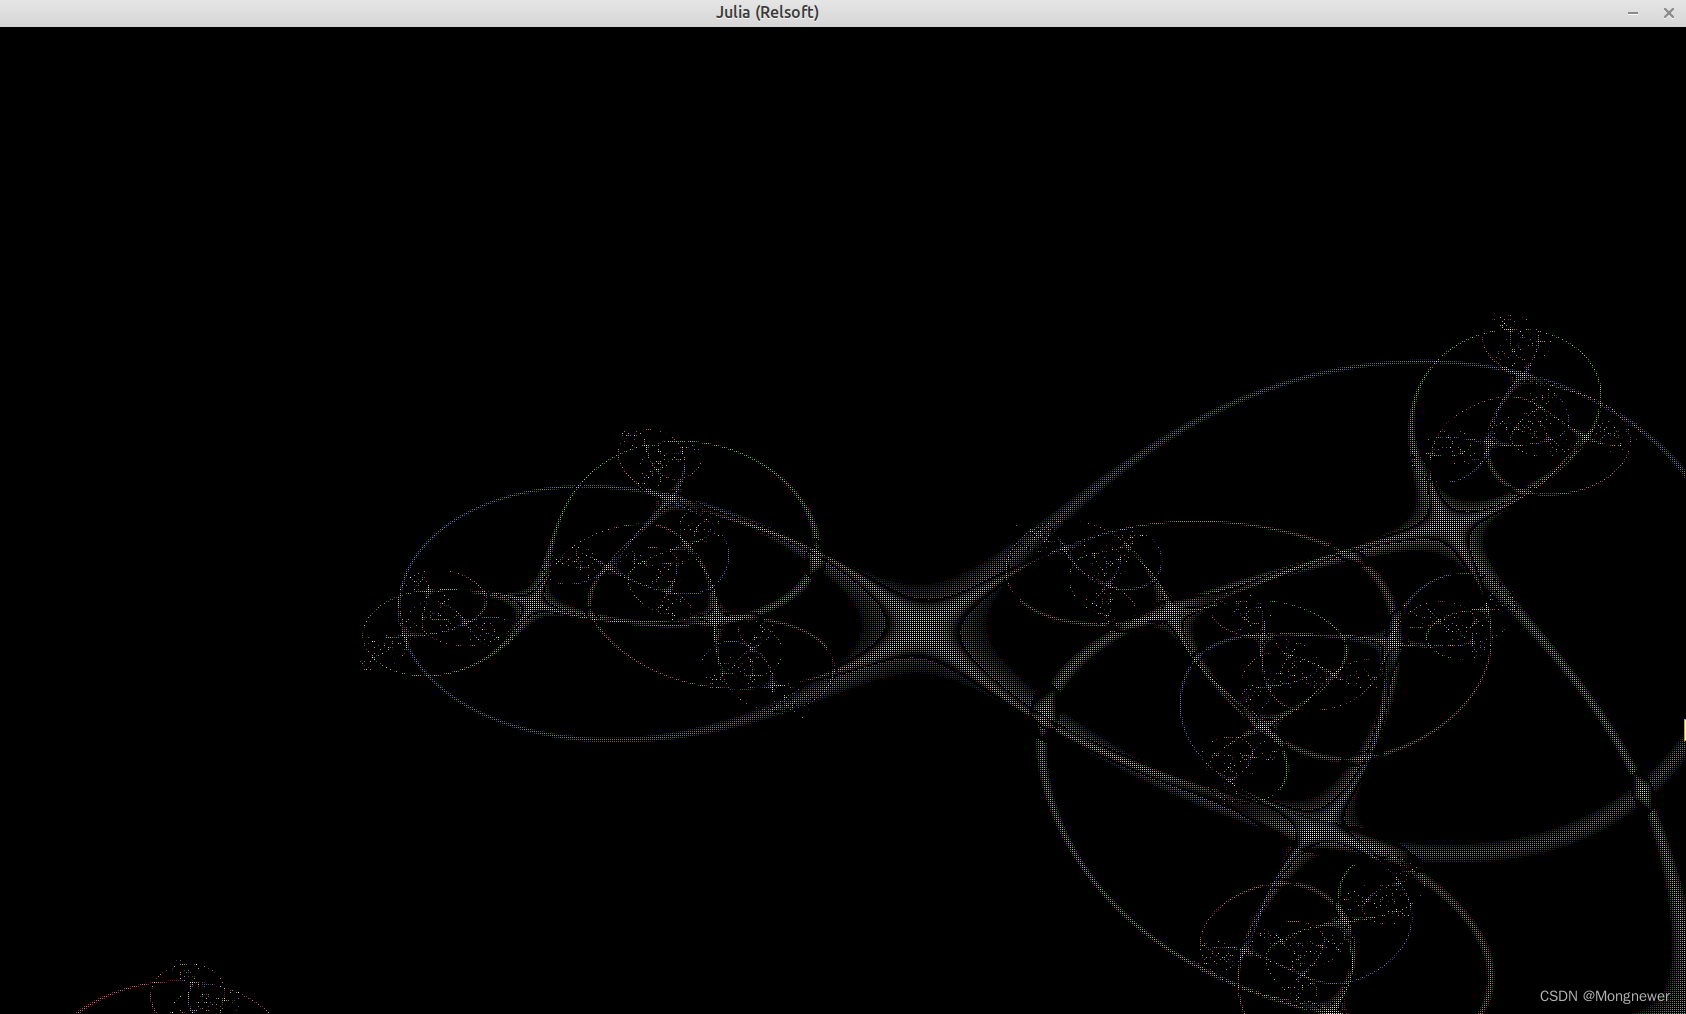
FreeBasic示例程序二:朱丽叶环
通过函数运算,将值放入数组,然后ptc_update到屏幕上。
' The Lord of the Julia Rings
' The Fellowship of the Julia Ring
' Free Basic
' Relsoft
' Rel.BetterWebber.com
'#ifdef __FB_WIN32__
#include once "windows.bi"
#endif#include once "tinyptc.bi"'320*240
'const SCR_WIDTH = 640 * 1
'const SCR_HEIGHT = 480 * 1const SCR_WIDTH = 1850 * 1
const SCR_HEIGHT = 1000 * 1const SCR_SIZE = SCR_WIDTH*SCR_HEIGHT
const SCR_MIDX = SCR_WIDTH \ 2
const SCR_MIDY = SCR_HEIGHT \ 2const PI = 3.141593
const MAXITER = 20
const MAXSIZE = 4dim shared Buffer(SCR_SIZE - 1) as integer
dim Lx(SCR_WIDTH-1) as single
dim Ly(SCR_HEIGHT-1) as single
dim shared sqrt(SCR_SIZE - 1) as singleif( ptc_open( "Julia (Relsoft)", SCR_WIDTH, SCR_HEIGHT ) = 0 ) thenend -1
end ifdim px as integer, py as integer
dim p as single, q as single
dim xmin as single, xmax as single, ymin as single, ymax as single
dim theta as single
dim deltax as single, deltay as single
dim x as single, y as single
dim xsquare as single, ysquare as single
dim ytemp as single
dim temp1 as single, temp2 as single
dim i as integer, pixel as integer
dim p_buffer as integer ptr, p_bufferl as integer ptr
dim t as uinteger, frame as uinteger
dim ty as single
dim r as integer, g as integer, b as integer
dim red as integer, grn as integer, blu as integer
dim tmp as integer, i_last as integerdim cmag as single
dim cmagsq as single
dim zmag as single
dim drad as single
dim drad_L as single
dim drad_H as single
dim ztot as single
dim ztoti as integerxmin = -2.0
xmax = 2.0
ymin = -1.5
ymax = 1.5deltax = (xmax - xmin) / (SCR_WIDTH - 1)
deltay = (ymax - ymin) / (SCR_HEIGHT - 1)for i = 0 to SCR_WIDTH - 1lx(i) = xmin + i * deltax
next ifor i = 0 to SCR_HEIGHT - 1ly(i) = ymax - i * deltay
next ifor i = 0 to SCR_SIZE - 1sqrt(i) = sqr(i)
next i#ifdef __FB_WIN32__dim hwnd as HWNDhwnd = GetActiveWindow( )
#endifdim stime as integer, Fps as single, Fps2 as singlestime = timerdop_buffer = @buffer(0)p_bufferl = @buffer(SCR_SIZE-1)frame = (frame + 1) and &H7ffffffftheta = frame * PI / 180p = cos(theta) * sin(theta * .7)q = sin(theta) + sin(theta)p = p * .6q = q * .6cmag = sqr(p *p + q* q)cmagsq = (p *p + q* q)drad = 0.04drad_L = (cmag - drad)drad_L = drad_L * drad_Ldrad_H = (cmag + drad)drad_H = drad_H * drad_Hfor py = 0 to (SCR_HEIGHT shr 1) - 1ty = ly(py)for px = 0 to SCR_WIDTH - 1x = Lx(px)y = tyxsquare = 0ysquare = 0ztot =0i = 0while (i < MAXITER) and (( xsquare + ysquare ) < MAXSIZE)xsquare = x * xysquare = y * yytemp = x * y * 2x = xsquare - ysquare + py = ytemp + qzmag = (x * x + y * y)if (zmag < drad_H) thenif (zmag > drad_L) and (i > 0) thenztot = ztot + ( 1 - (abs(zmag - cmagsq) / drad))i_last = iend ifend ifi = i + 1if zmag > 4.0 thenexit whileend ifwendif ztot > 0 theni = cint(sqr(ztot) * 500)elsei = 0end ifif i < 256 thenred = ielsered = 255end ifif i < 512 and i > 255 thengrn = i - 256elseif i >= 512 thengrn = 255elsegrn = 0end ifend ifif i <= 768 and i > 511 thenblu = i - 512elseif i >= 768 thenblu = 255elseblu = 0end ifend iftmp = cint((red+grn+blu) * 0.33)red = cint((red+grn+tmp) * 0.33)grn = cint((grn+blu+tmp) * 0.33)blu = cint((blu+red+tmp) * 0.33)select case (i_last and 3)case 1tmp = redred = grngrn = blublu = tmpcase 2tmp = redblu = grnred = blugrn = tmpend selectpixel = rgb( red, grn, blu )*p_buffer = pixel*p_bufferl = pixelp_buffer = p_buffer + 1p_bufferl = p_bufferl - 1next pxnext py'calc fpsfps = fps + 1if stime + 1 < timer thenfps2 = fpsfps = 0stime = timer
#ifdef __FB_WIN32__SetWindowText( hwnd, "FreeBasic Julia Rings FPS:" & Fps2 )
#endifend ifptc_update @buffer(0)
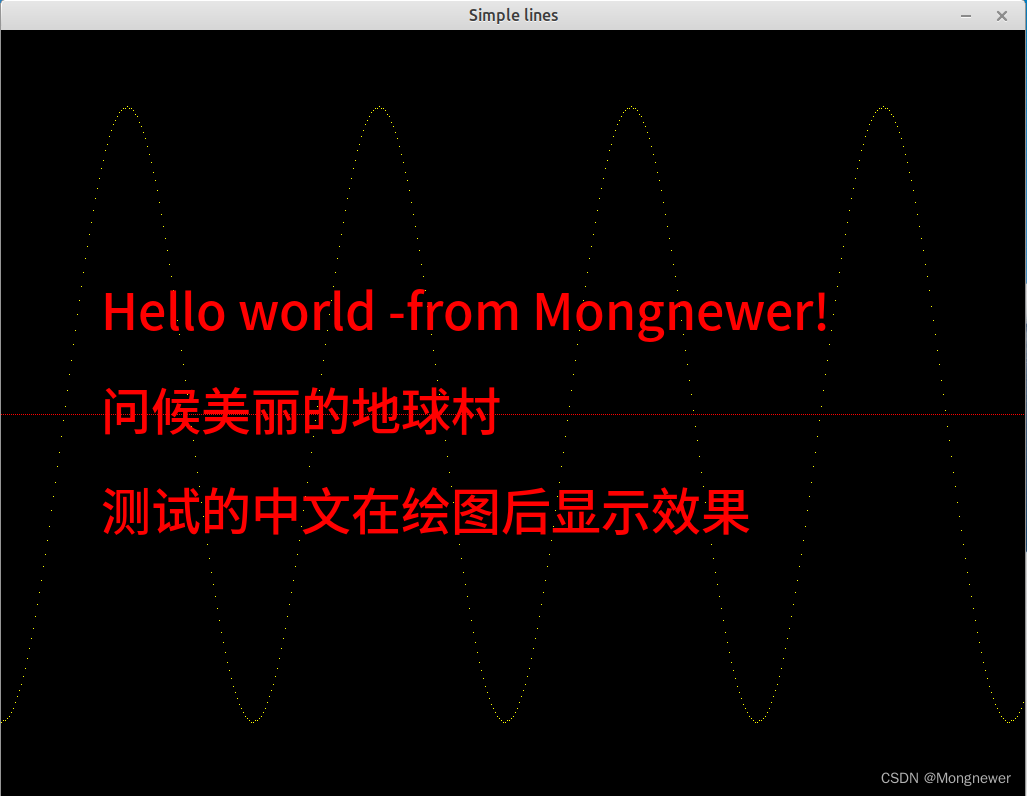
loop until inkey <> ""ptc_closeend由于它体积小,在嵌入式设备上有一定用处,在数据算法绘图上也能用,操作步骤简单,也决定了操控灵活性上有局限性。CSDN 上也能找到 TinyPTC 的应用和简介,所以就把它编译和试运行效果贴上来了。但是,它的功能似乎需要改造,比如显示个中文标注之类的,SDL对中文的渲染显示要SDL_TTF支持,而且用着不很顺手,还是cairo比较得以应手。
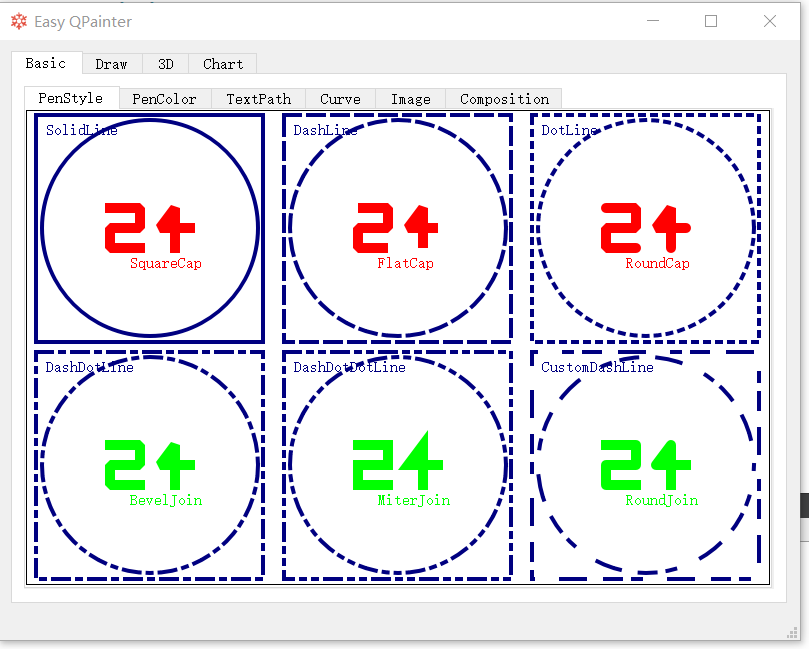
改造TinyPTC-SDL-0.3.2的相关文件和Makefile,增加freebasic可使用的 ptc_drawtest 函数,修改tinyptc.bi文件, 修改示例程序一,之后运行的效果如下(思来想去改造它没意义,因为freebasic本身就支持SDL, CAIRO,可以直接编程做图):
具体改造:
1、给sdl.c加引用 #include "cairo/cairo.h" ,然后定义cairo_surface_t *csurf; 和 cairo_t *crx; 两个指针,再加上 int ptc_drawtest 函数。
在它的头文件tinyptc.h中加上一句 extern int ptc_drawtest(void);extern int ptc_drawtest(void); ,让外部程序访问使用。
需关注的要点一:SDL_SetVideoMode产生的指针不是cairo要用的surface指针,要用它的 pixels 创建 cairo surface
需关注的要点二:cairo 显示完成后,要用 SDL_Flip 渲染 cairo 在 surface 上创建的文字。
int
ptc_drawtest(void)
{//Best fit, 1024 x 768csurf = cairo_image_surface_create_for_data( \ptc_video_surface->pixels, CAIRO_FORMAT_ARGB32, \ptc_stored_width, ptc_stored_height, ptc_stored_width*4);crx = cairo_create(csurf);cairo_set_source_rgba(crx, 1.0, 0.0, 0.0, 1.0);cairo_set_font_size(crx, 50.0);cairo_move_to(crx, 100, 300);cairo_show_text(crx, "Hello world -from Mongnewer!");cairo_move_to(crx, 100, 400);cairo_show_text(crx, "问候美丽的地球村");cairo_move_to(crx, 100, 500);cairo_show_text(crx, "测试的中文在绘图后显示效果");cairo_stroke(crx);SDL_Flip(ptc_video_surface);return PTC_SUCCESS;
}
2、对tinyptc.bi文件的改造(在 /usr/local/include/freebasic下面)
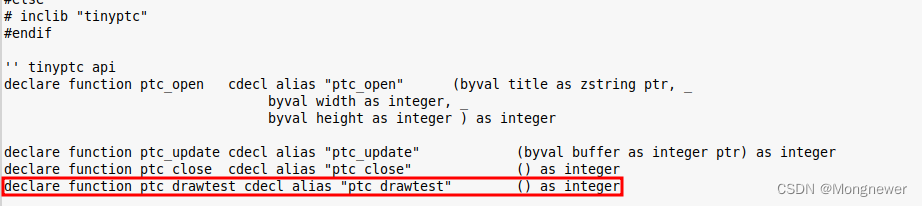
3、原来的make文件生成库时把测试程序也链接进去了,这样freebasic程序在编译时会出现main函数重复定义错误,因此生成库中去除原来的测试程序。
4、笔记示例一程序的修改:头部加上 #include "cairo/cairo.bi",在尾部 ptc_update @buffer(0)后面加上 ptc_drawtest()
修改后的TinyPTC放在csdn上了,下载后可看到修改细节。下面是它的链接:
CSDN下载链接![]() https://download.csdn.net/download/weixin_45707491/88966995
https://download.csdn.net/download/weixin_45707491/88966995
下面是FreeBASIC直接操作SDL和CAIRO显示汉字示例
' SDL_image example written by Edmond Leung (leung.edmond@gmail.com)
'
' free.jpg, basic.gif and horse.tga are taken from the official freeBasic
' website.
' modified by: Mongnewer 25 march 2024#include  "SDL\SDL.bi"
#include  "SDL\SDL_image.bi"
#include  "cairo/cairo.bi"Const SCR_WIDTH = 1124
Const SCR_HEIGHT = 868dim shared video as SDL_Surface ptr
dim shared freeImg as SDL_Surface ptr, basicImg as SDL_Surface ptr, horseImg as SDL_Surface ptr
dim version as const SDL_version ptrdim shared csurf as cairo_surface_t ptr
dim shared crx as cairo_t ptrdeclare sub drawtest()declare sub blitImage _(byval img as SDL_Surface ptr, byval x as integer, byval y as integer)'	dim shared video as SDL_Surface ptr
'	dim freeImg as SDL_Surface ptr, basicImg as SDL_Surface ptr, horseImg as SDL_Surface ptr'	dim version as const SDL_version ptrversion = IMG_Linked_Version()' display the version number of the SDL_image being usedprint "Using SDL_image version number: "; SDL_VERSIONNUM(version->major, _version->minor, version->patch)' initialise sdl with video supportif (SDL_Init(SDL_INIT_VIDEO) < 0) thenprint "Couldn't initialise SDL: "; *SDL_GetError()end if' check to see if the images are in the correct formatsif (IMG_isJPG(SDL_RWFromFile("data/free.jpg", "rb")) = 0) thenprint "The image (free.jpg) is not a jpg file."end ifif (IMG_isGIF(SDL_RWFromFile("data/basic.gif", "rb")) = 0) thenprint "The image (basic.gif) is not a gif file."end if' set the video modevideo = SDL_SetVideoMode(SCR_WIDTH, SCR_HEIGHT, 32, SDL_HWSURFACE or SDL_DOUBLEBUF)if (video = NULL) thenprint "Couldn't set video mode: "; *SDL_GetError()end if' load the images into an SDL_RWops structuredim freeRw as SDL_RWops ptr, basicRw as SDL_RWops ptrfreeRw = SDL_RWFromFile("data/free.jpg", "rb")basicRw = SDL_RWFromFile("data/basic.gif", "rb")' load the images onto an SDL_Surface using three different functions available' in the SDL_image libraryfreeImg = IMG_LoadJPG_RW(freeRw)horseImg = IMG_Load("data/horse.tga")basicImg = IMG_LoadTyped_RW(basicRw, 1, "gif")dim done as integerdone = 0do while (done = 0)dim event as SDL_Eventdo while (SDL_PollEvent(@event))if (event.type = SDL_QUIT_) then done = 1if (event.type = SDL_KEYDOWN) thenif (event.key.keysym.sym = SDLK_ESCAPE) then done = 1      end ifloopdim destrect as SDL_Rectdestrect.w = video->wdestrect.h = video->h' clear the screen with the colour whiteSDL_FillRect(video, @destrect, SDL_MapRGB(video->format, 255, 255, 255))' draw the images onto the screen'blitImage freeImg, 245, 205 'blitImage basicImg, 250, 230 'blitImage horseImg, 145, 200 blitImage freeImg, 170, 205blitImage horseImg, 345, 330 blitImage freeImg, 445, 335 blitImage basicImg, 450, 360 blitImage freeImg, 650, 215 blitImage basicImg, 650, 240 		blitImage freeImg, 150, 455 blitImage basicImg, 150, 480 		drawtest()SDL_Flip(video)sleep 20loopcairo_destroy(crx)cairo_surface_destroy(csurf)SDL_Quit' sub-routine used to help with blitting the images onto the screen
sub blitImage _(byval img as SDL_Surface ptr, byval x as integer, byval y as integer)dim dest as SDL_Rectdest.x = xdest.y = ySDL_BlitSurface(img, NULL, video, @dest)
end subsub drawtest()'Best fit, 1024 x 768csurf = cairo_image_surface_create_for_data( _video->pixels, CAIRO_FORMAT_ARGB32, _SCR_WIDTH, SCR_HEIGHT, SCR_WIDTH*4)crx = cairo_create(csurf)cairo_set_source_rgba(crx, 1.0, 0.0, 0.0, 1.0)cairo_set_font_size(crx, 20.0)cairo_move_to(crx, 600, 600)cairo_show_text(crx, "Hello world -from Mongnewer!")cairo_move_to(crx, 600, 650)cairo_show_text(crx, "问候美丽的地球村")cairo_move_to(crx, 600, 700)cairo_show_text(crx, "测试的中文在绘图后显示效果")cairo_stroke(crx)SDL_Flip(video)
end sub
显示效果