在使用MySQL数据库的过程中,如果遇到一些复杂的问题,可以通过GDB进行调试,本篇将演示如何在Win 10环境基于VSCode搭建MySQL源码调试环境。
一、调试环境
本次调试需要用到的软件和环境为:
- Red Hat Enterprise Linux release 8.10 (Ootpa)
- MySQL 8.0.40
- VSCode 1.96.4
二、编译安装MySQL源码调试版本
这里将在Linux环境编译安装MySQL源码,如何编译安装MySQL源码可参考《MySQL 8 源码编译安装和配置数据库》。
编译命令为
cmake .. -DCMAKE_INSTALL_PREFIX=/u01/export/mysql -DWITH_DEBUG=1 -DWITH_BOOST=/u01/mysql-8.0.40/boost/boost_1_77_0
初始化后的数据库信息为:
[root@sourcecode mysql]# ./bin/mysql -uroot -p
Enter password:
Welcome to the MySQL monitor.  Commands end with ; or \g.
Your MySQL connection id is 9
Server version: 8.0.40-alen-debug Source distribution
Copyright (c) 2000, 2024, Oracle and/or its affiliates.
Oracle is a registered trademark of Oracle Corporation and/or its
affiliates. Other names may be trademarks of their respective
owners.
Type 'help;' or '\h'forhelp. Type '\c' to clear the current input statement.
mysql> select version();
+-------------------+
| version()         |
+-------------------+
| 8.0.40-alen-debug |
+-------------------+
1 row inset (0.00 sec)
mysql>
上面完成了MySQL的编译、安装和初始化,接下来将会配置VSCode进行MySQL源码的调试。
三、安装VSCode扩展
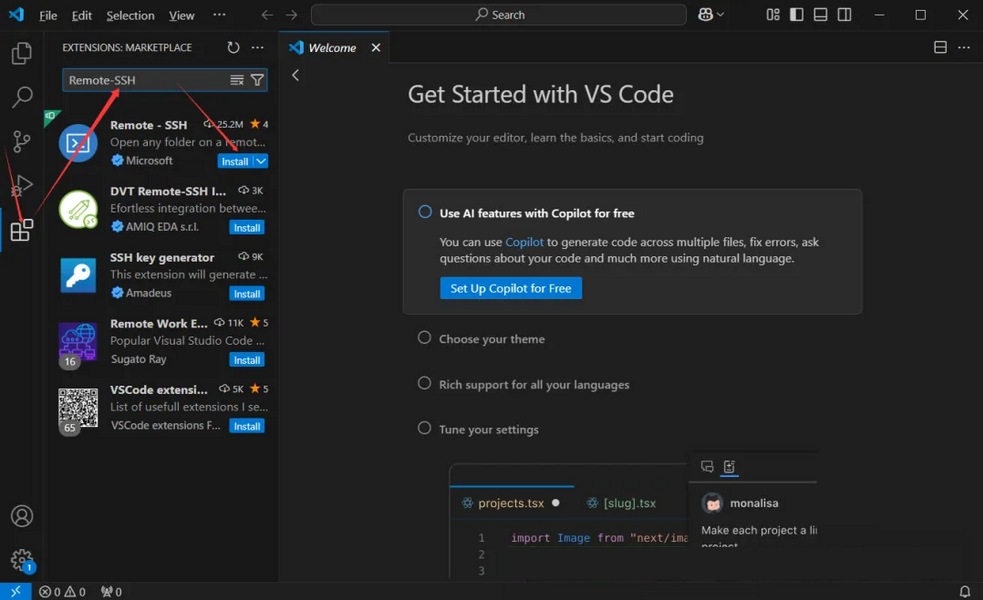
由于MySQL源码放在远程Linux服务器,故需要在本地安装Remote - SSH插件,通过该插件可以SSH远程到Linux服务器,同时还需要在远程Linux服务器安装C/C++,用于进行源码调试。
1、安装Remote - SSH插件,选中Extensions,在搜索框输入Remote-SSH进行搜索,然后选中并点击Install进行安装
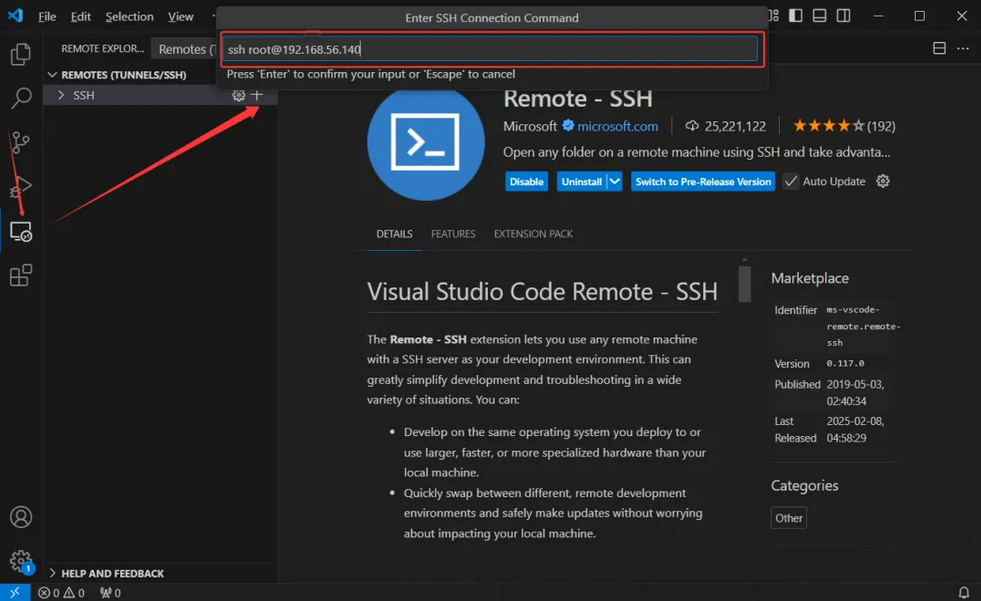
2、安装完成,SSH连接到远程Linux服务器,选择Remote Explorer,点击+号,在输入框输入远程主机信息,点击回车
3、选择ssh配置文件位置

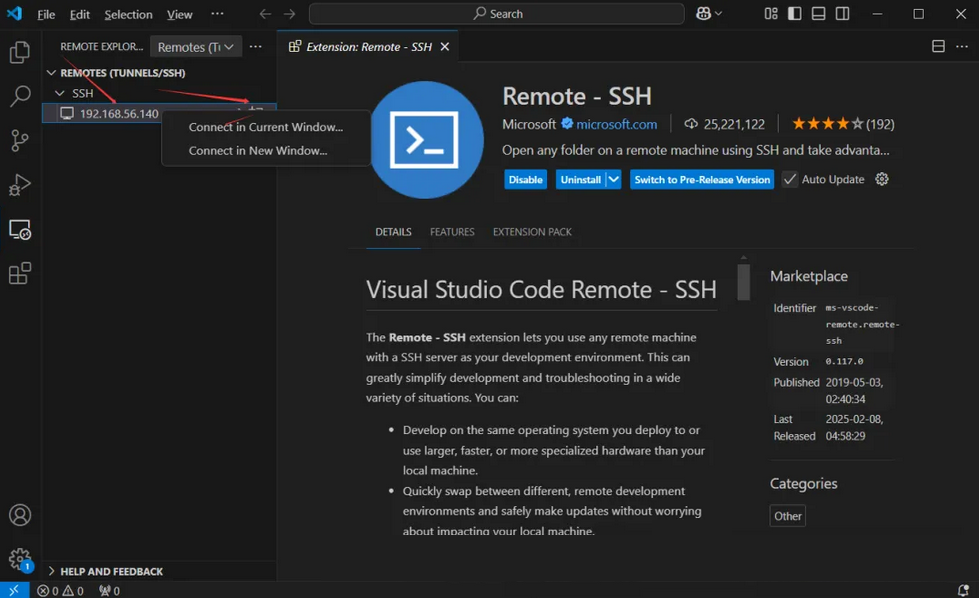
4、点击SSH,选择刚SSH的主机,点击+,进行连接到远程Linux服务器
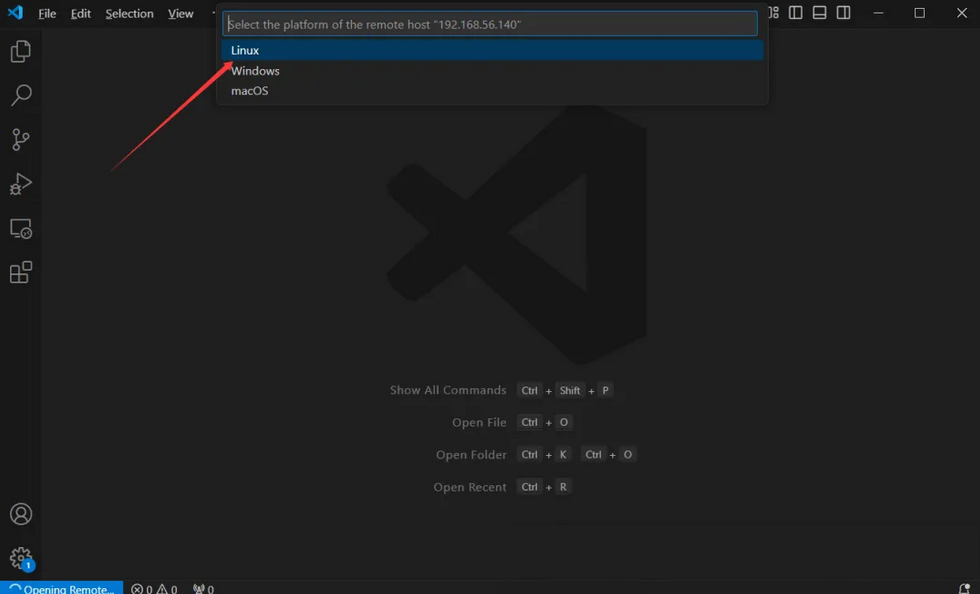
5、选择Linux
6、选择Continue

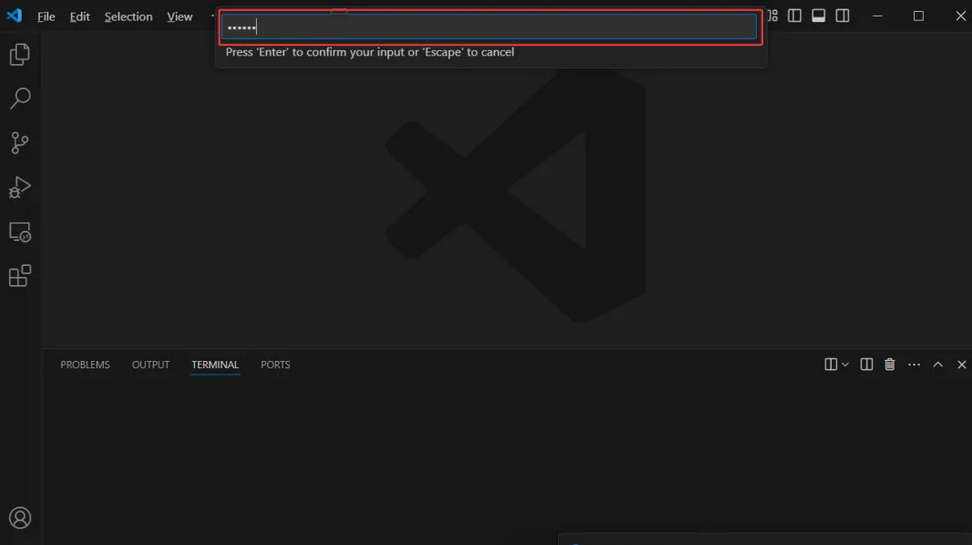
7、输入连接远程Linux服务器的密码,并回车
8、SSH连接到远程Linux服务器,选中Extensions,在搜索框输入C/C++进行搜索,然后选中并点击Install进行安装

四、 调试MySQL源码
VSCode插件安装完成后,就可以进行MySQL源码的调试了。
1、打开源码所在目录,并输入密码确认

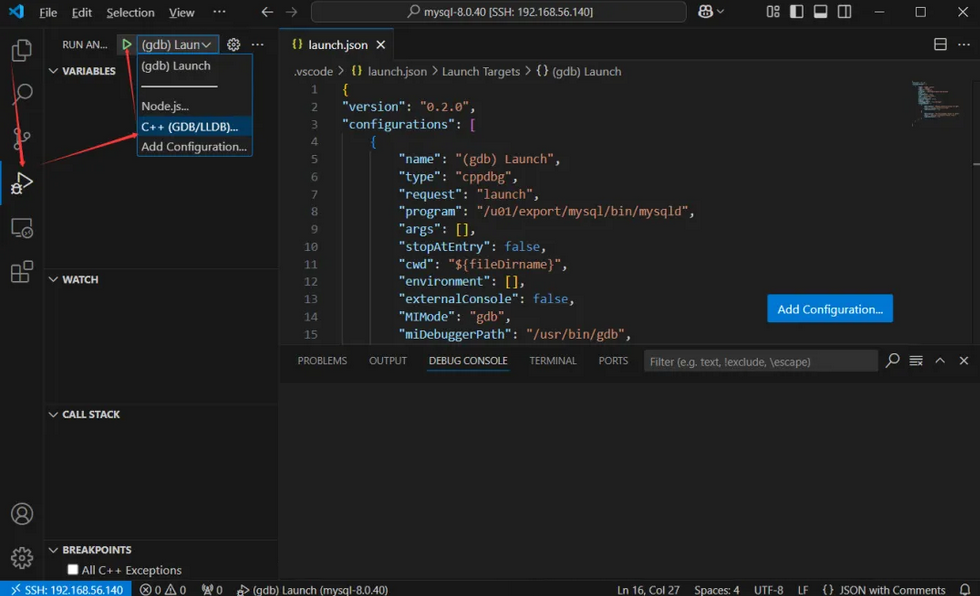
2、配置VSCode插件
[root@sourcecode export]# cd /u01/mysql-8.0.40/
[root@sourcecode mysql-8.0.40]# mkdir .vscode
[root@sourcecode mysql-8.0.40]# cd .vscode/
[root@sourcecode mysql-8.0.40]# vim launch.json
{
"version": "0.2.0",
"configurations": [
{
"name": "(gdb) Launch",
"type": "cppdbg",
"request": "launch",
"program": "/u01/export/mysql/bin/mysqld",
"args": [],
"stopAtEntry": false,
"cwd": "${fileDirname}",
"environment": [],
"externalConsole": false,
"MIMode": "gdb",
"miDebuggerPath": "/usr/bin/gdb",
"setupCommands": [
{
"description": "Enable pretty-printing for gdb",
"text": "-enable-pretty-printing",
"ignoreFailures": true
},
{
"description": "Set Disassembly Flavor to Intel",
"text": "-gdb-set disassembly-flavor intel",
"ignoreFailures": true
}
]
}
]
}
3、启动GDB调试
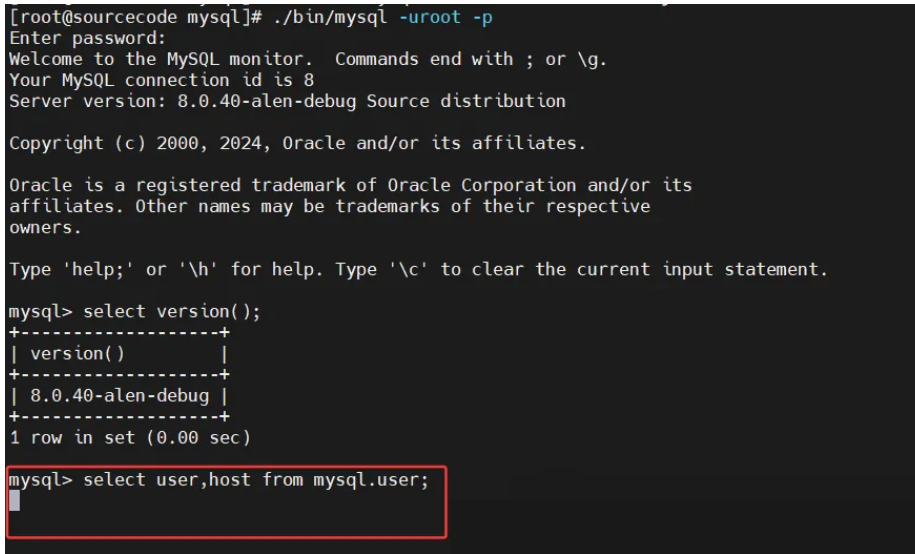
4、登录Linux服务器,并连接MySQL
[root@sourcecode mysql]# ./bin/mysql -uroot -p
Enter password:
Welcome to the MySQL monitor.  Commands end with ; or \g.
Your MySQL connection id is 8
Server version: 8.0.40-alen-debug Source distribution
Copyright (c) 2000, 2024, Oracle and/or its affiliates.
Oracle is a registered trademark of Oracle Corporation and/or its
affiliates. Other names may be trademarks of their respective
owners.
Type 'help;' or '\h'forhelp. Type '\c' to clear the current input statement.
mysql> select version();
+-------------------+
| version()         |
+-------------------+
| 8.0.40-alen-debug |
+-------------------+
1 row inset (0.00 sec)
mysql>
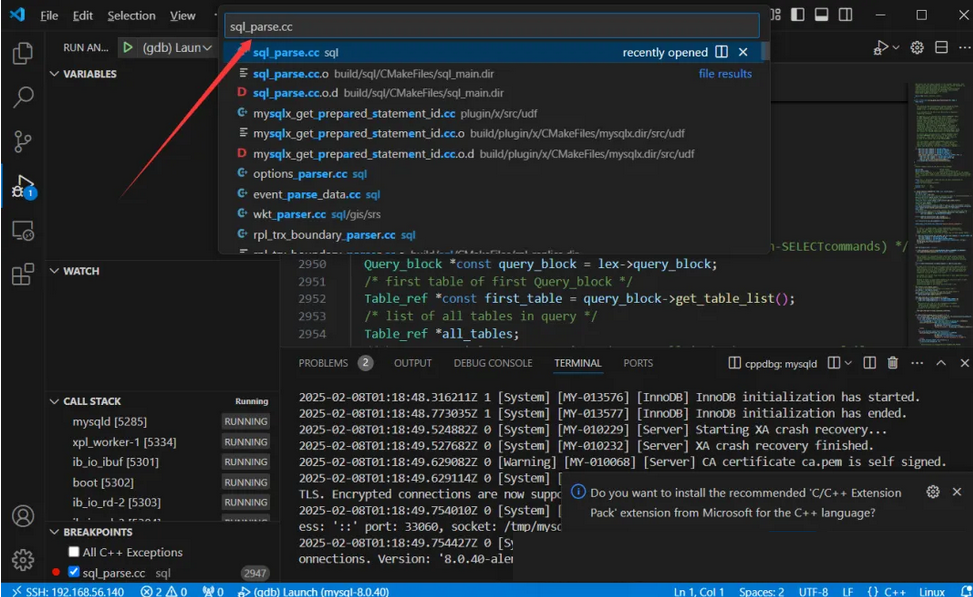
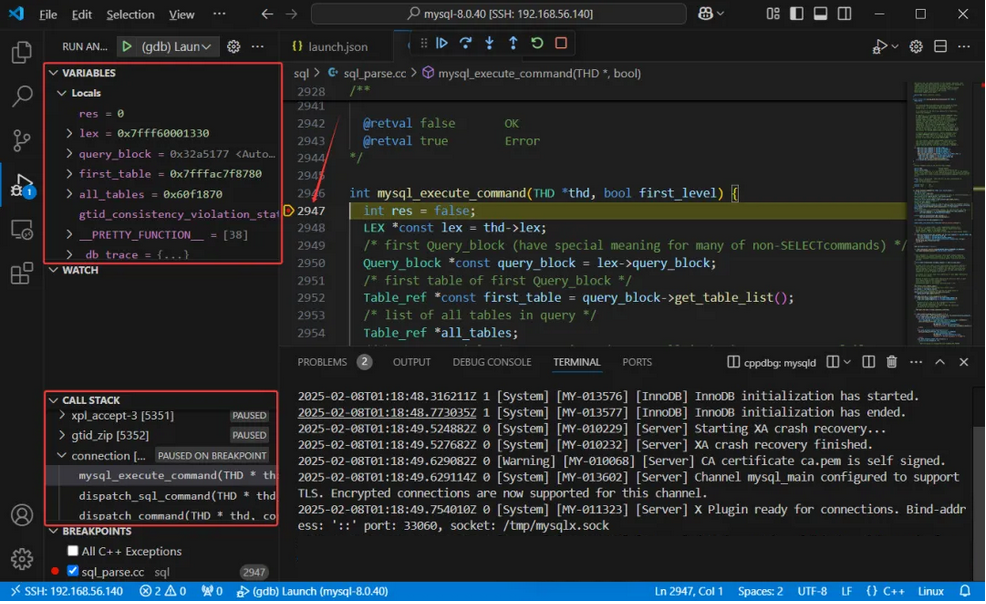
5、VSCode打断点,在上方输入框中输入待调试的源码,这里以sql_parse.cc为例,在2947行处理打上断点
6、MySQL端执行SQL,出现了暂停,那是因为程序运行到断点处了
7、程序运行到断点处暂停了,然后可看到运行时信息,可以看到变量、调用栈相关的信息
以上就是在VSCode搭建MySQL源码调试环境的完整步骤。
原创 AlenSZ Alen的数据库学习笔记